


Cyanotype — this centuries-old photographic printing technique has never stopped inspiring creative enthusiasts. Simple and accessible, it allows you to create unique works of art with minimal equipment. Follow our guide to master the cyanotype process and reveal the artist within you.

What is the cyanotype technique?
The cyanotype technique, invented in the 19th century by British scientist Sir John Herschel, is considered one of the earliest photographic printing processes.
This process involves mixing two chemicals: ferric ammonium citrate and potassium ferricyanide. Once combined, these substances form a photosensitive solution that, when applied to a surface such as paper or fabric, becomes sensitive to light. When the coated surface is exposed to sunlight, the areas not covered by a negative or object turn blue, while the shaded areas remain white or light, creating a striking contrast.
The result is an image in shades of Prussian blue, a deep, rich hue that gives the cyanotype its distinctive charm and visual identity. This technique does not require a darkroom for development and is appreciated both for its simplicity and for the beauty of its results.
Cyanotypes are also known for their durability, as they resist fading remarkably well.
Getting the right equipment and choosing your materials for cyanotype
To start practicing cyanotype, it’s essential to have the proper equipment. Although relatively simple, this technique requires specific tools and materials to ensure high-quality results.
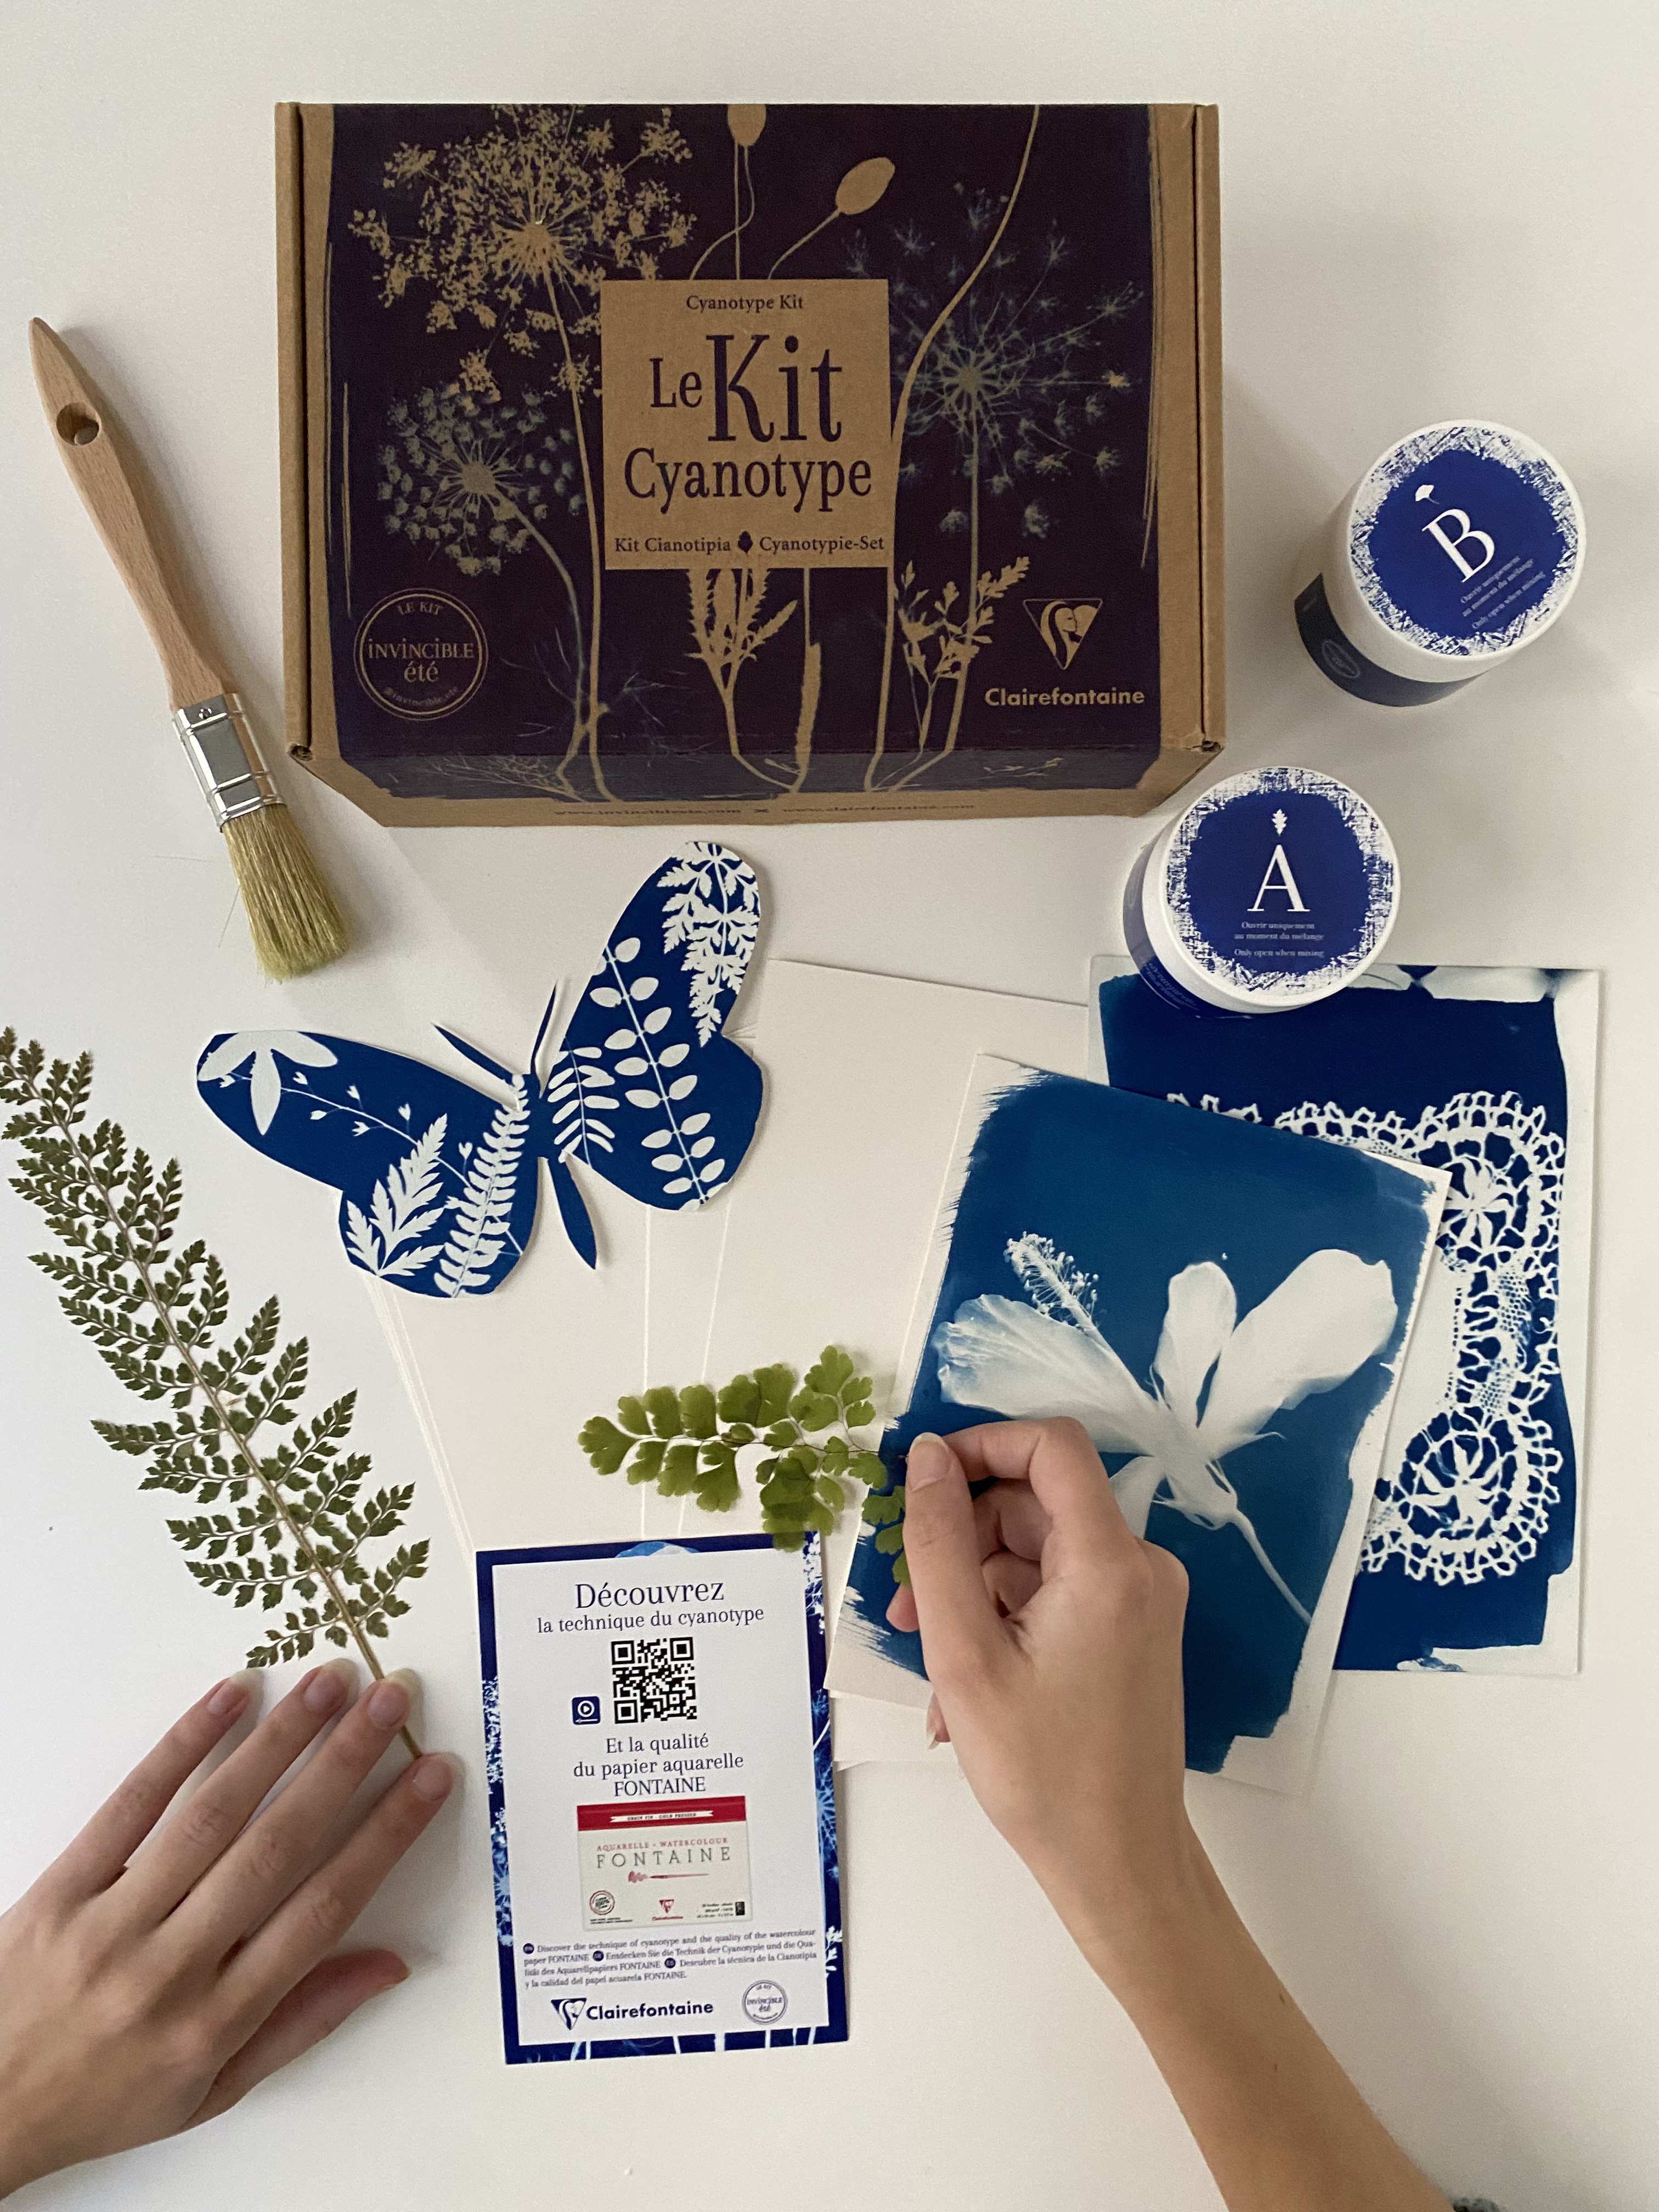
It’s ideal to obtain a cyanotype kit that includes the necessary chemicals — ferric ammonium citrate and potassium ferricyanide — along with step-by-step instructions. You’ll also need some basic tools such as a pair of gloves, a brush or sponge to apply the solution, a tray filled with water for rinsing, and of course, a light source, usually sunlight.

What type of paper should be used for the cyanotype technique?
When exploring the art of cyanotype, the choice of paper is crucial. For optimal results, it’s important to use paper with a certain thickness and strength. Thin papers, such as standard printer paper, are unsuitable because they don’t absorb the cyanotype solution properly, resulting in pastel shades instead of the characteristic Prussian blue.
Additionally, their fragility becomes evident during the rinsing stage, where they may weaken, disintegrate, or even tear.
At Clairefontaine, you can opt for the Cyanotype Paper, which is specially recommended for this process

To ensure cyanotypes with satisfying aesthetics and durability, it’s recommended to use paper weighing at least 160 g/m². A weight around 220 g/m² is ideal, offering a near-cardboard quality that minimizes the risk of deterioration. While it’s possible to use even thicker papers—up to 350 g/m²—the impact on image quality becomes marginal beyond 220 g/m². However, these heavier papers provide a premium, professional feel, enhancing the tactile and visual quality of the finished work.
Cyanotypes can be created on various surfaces, but high-quality paper, such as those made by Clairefontaine, ensures the best results.
You can also experiment with fabric, wood, or even glass for more creative and unconventional projects.
To create images or shapes, use photographic negatives, leaves, flowers, lace, or any other opaque objects to produce interesting contrasts.
If you enjoy cyanotype printing, explore the art of scrapbooking — check out our beginner’s guide to scrapbooking!
Preparing the chemicals and storage tips
Preparing the cyanotype solution is a crucial step.
In a light-protected room, mix the two chemicals — ferric ammonium citrate and potassium ferricyanide — in equal proportions. Add water to achieve the proper chemical mixture. The ingredients provided in your cyanotype kit can be used all at once or in several batches.
Remember to wear gloves and protect your workspace and clothing to avoid staining.
Once mixed, the solution should be stored away from light, for no more than 15 days, in an opaque container to prevent degradation.
Coating the surface and adding elements
Still in a dark or low-light room, prepare the surface you plan to use — paper or fabric.
Using a brush, evenly apply the cyanotype solution to the surface. Allow it to dry in darkness to avoid premature exposure.
Once dry, place your chosen elements — negatives, leaves, or various objects — on the surface. This arrangement will determine the final image of your cyanotype.
Keep in mind that thin objects may allow some sunlight to pass through, creating varying levels of opacity and adding unique artistic effects.
Exposure and rinsing
Exposure is the magical moment when the image comes to life. Place your prepared surface under sunlight. The exposure time varies depending on light intensity and desired contrast — typically between a few minutes (at least 5 minutes) and one hour.
After exposure, immediately immerse your creation in water, gently agitating it to rinse and fix the image. You’ll then see the transformation from yellow-green to deep Prussian blue, characteristic of cyanotypes.
The areas exposed to sunlight will turn this beautiful Prussian blue, while the parts covered by objects will remain the original color of the surface.
Allow your cyanotype to air-dry, keeping it out of direct sunlight.
What should you take away from the cyanotype technique?
The cyanotype process is a fascinating way to explore both photography and art. With the Clairefontaine cyanotype kit and its ease of use, you can create personal and expressive works of art.
The cyanotype technique beautifully combines art and chemistry. Its simplicity allows everyone to fully unleash their creative potential. It offers both beginners and experienced creators an expressive and accessible way to capture images and patterns.
This process is a captivating exploration of chemistry and light, inviting you to rediscover the magic of handmade creation.